Growing your own tomatoes can be as simple as planting a slice of the tomato you just bought at the store!
By carefully handling the seeds or even burying a ripe tomato slice in soil, you can sprout new plants.
As an avid gardener, I’ve turned kitchen scraps into flourishing tomato plants. This guide will show how to grow tomatoes from a tomato, sharing hands-on tips and the science behind this fun trick.
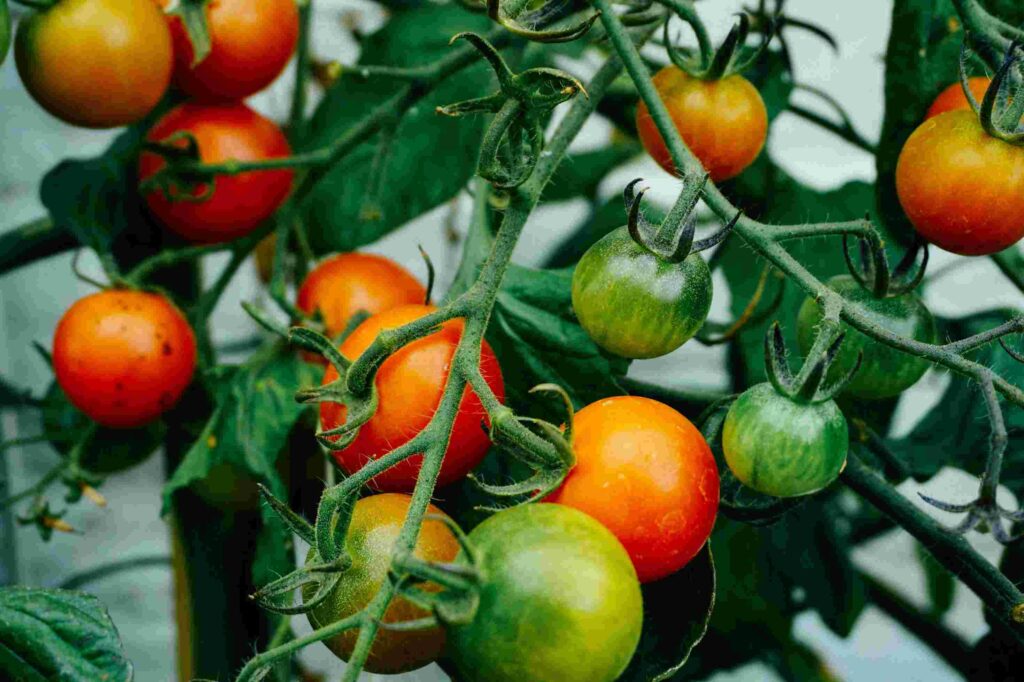
Tomatoes ripening on the vine. I’ve always loved turning kitchen scraps into something fruitful.
Instead of tossing a nearly expired tomato, try giving it new life: tomatoes contain dozens of viable seeds inside ripe fruit.
In fact, many gardeners have successfully sprouted tomato plants from slices or seeds of supermarket produce.
Keep in mind, though, that if your tomato was a hybrid (as most grocery varieties are), the new plants may not yield exactly the same fruit. Also, seeds from organic or heirloom tomatoes tend to do best.
Why Growing from a Tomato Works
Tomato fruit is essentially a seed packet – each ripe tomato can contain dozens of seeds, each capable of germinating into a plant.
The only caveat is a sticky gel surrounding each seed: this gel naturally inhibits sprouting until it decomposes.
To speed growth, you should remove or break down that gel. According to a Houzz gardening expert, “the key is getting that little gel sac off the seed, and then drying the seed a bit.
As I understand it, the gel contains a growth inhibitor”. (In practice, this means either fermenting and rinsing seeds, or simply wiping seeds clean before planting.)
Fortunately, studies show removing this inhibitory coating can dramatically boost germination.
Homegrown gardening guides note that fermenting tomato seeds (letting the pulp sit in water for a few days) dissolves the gel and improves germination rates by 80–90%.
After cleaning the seeds, you’re essentially left with raw tomato seed ready to sprout.
In fact, one seed-saving article confirms you can save seeds from supermarket tomatoes (preferably organic or locally grown) and plant them later. Just be aware that any disease or hybrid traits of the original tomato can carry over.
Materials You’ll Need
- A ripe tomato: Heirloom or organic varieties work best, but any fresh, ripe tomato will do.
- A pot or seed tray: Fill it about ¾ full with a loose, well-draining potting mix.
- Growing medium: Use quality seed-starting mix or potting soil, moistened but not soaked.
- Water: Keep a spray bottle or watering can handy to gently water.
- Cover (optional): A clear plastic dome, plastic wrap, or glass jar can help maintain humidity.
- Sunlight or grow light: Tomatoes need warmth (around 20–25°C) and bright light once sprouted.
Step-by-Step Planting Process
- Slice the tomato (or extract seeds). Cut a ripe tomato into thick slices (about 1–2 cm thick). You can also cut it in half through the middle to expose the seed chambers. Optionally, scoop out the seeds into a bowl, gently rinse off the gel (or ferment them), and pat them dry. Tip: Using a very ripe tomato ensures the seeds inside are mature.
- Prepare the potting mix. Fill your pot or tray with moist potting soil. Lightly press it down but keep it loose. The goal is a flat, damp surface for planting.
- Plant the slice or seeds. Gently press the tomato slice into the soil so it’s about 1 cm below the surface. For seeds, drop several cleaned seeds onto the soil surface and barely cover them with a thin layer of soil. (Gardening writer Corinne Mossati simply covered her tomato slice with about 1.5 cm of soil.)
- Water carefully. Moisten the soil gently with water so the slice and seeds are in constant dampness, but avoid waterlogging. If the slice is very thick, leave a small gap for air by not burying it completely.
- Cover to maintain humidity (optional). Place a clear plastic dome or wrap over the pot to create a mini-greenhouse. This keeps humidity high, which helps seeds and tomato slices start to decay and sprout. (Just lift the cover daily to let in fresh air and prevent mold.)
- Find the right spot. Put the pot in a warm (around 20–25°C), bright location. A sunny windowsill or under a grow light is ideal. Tomatoes love warmth, so avoid cold drafts.
- Wait for seedlings. Keep the soil consistently moist (mist daily) and be patient. Most seeds will sprout in 1–3 weeks. Mossati observed tiny tomato seedlings after about two weeks.
- Thin and transplant. Once small green shoots appear, uncover them. As seedlings grow their first true leaves, keep the strongest one or two per pot and snip or gently remove extras. When a seedling reaches roughly 10 cm tall with a few leaves, it’s ready to go into a larger container or the garden. Use a gentle touch and firm soil around its base.
- Care for your new plants. Gradually remove any cover as the seedlings acclimate. Move the pot to direct light for 6–8 hours daily. Water whenever the topsoil starts to dry (tomatoes are thirsty plants). After a few weeks, feed them lightly with a balanced liquid fertilizer or compost tea. If you’d like to focus on a compact, high-yield variety once your seedlings are established, check out my detailed guide on growing Bush Goliath tomatoes.
Tips for Success
- Choose the right tomato. An heirloom or organic tomato is best. Supermarket hybrids can still sprout, but remember that hybrid genes won’t “breed true” – the new tomatoes may taste or look different. Seed-saver blogs recommend using locally grown, open-pollinated fruit if possible.
- Time it well. Tomatoes are warm-season plants. As Mossati notes, doing this in spring or summer (not late fall) gives the best results. If you start indoors in cooler weather, the plants may grow slowly or show purple leaves (a sign of cool stress) until warmer days arrive.
- Keep conditions stable. Consistent moisture and warmth are crucial. Avoid waterlogging slices, as excess rot can invite mold. If a slice appears to decay, you can still rescue healthy seeds and replant them.
- Watch for pests. Young seedlings can attract aphids or fungal problems if overcrowded. Ensure good air circulation around the pot (remove the cover once sprouts appear).
- Be patient. Tomato germination isn’t instant. Keep monitoring moisture and don’t give up if nothing appears for 10–14 days. Usually one or two healthy sprouts will emerge to grow into a plant.
Yes – you can really plant a tomato and grow more tomatoes! In fact, one gardener’s experiment showed it works reliably: she simply laid a thick tomato slice on potting soil, kept it moist, and two weeks later had dozens of seedlings poking up.
The new plants grew strong (with a bit of thinning and transplanting) and even produced fruit in the following season.
Just remember Mossati’s main advice: use a good-quality tomato and garden soil, and grow in the right season.
Growing tomatoes this way is a great example of using what you have – it’s low-cost and fun science.
I’ve tried it myself and found it surprisingly easy. My own seedlings grew into happy little plants in just a few weeks, and by summer I had homegrown tomatoes started from a grocery store fruit.
While saving actual heirloom seeds is more reliable, this kitchen-scrap method is rewarding and educational.
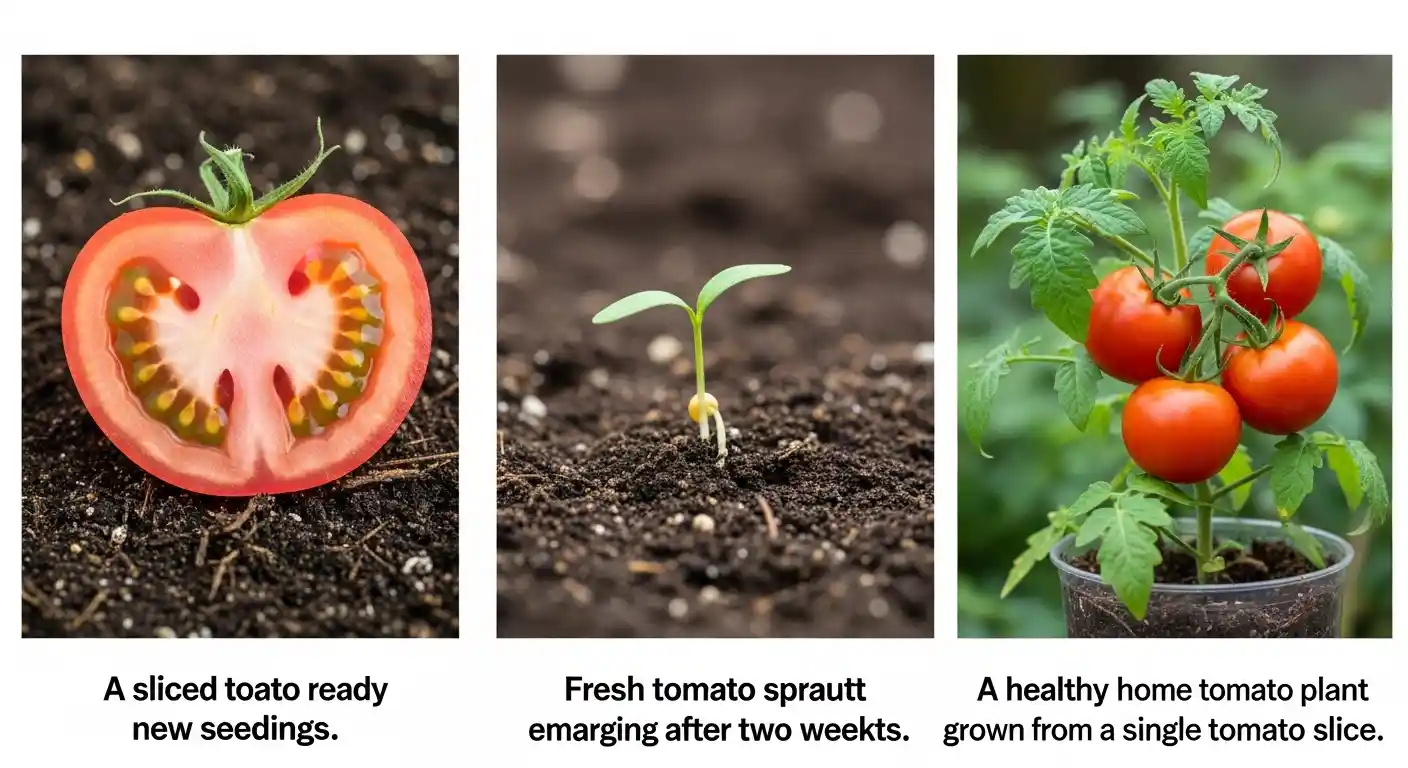
Image ideas for this article: To illustrate the process, consider photos such as (1) a sliced tomato placed on moist potting soil (“A sliced tomato ready to sprout new seedlings.”), (2) a close-up of a tiny tomato seedling breaking the soil surface (“Fresh tomato sprout emerging after two weeks.”), and (3) a mature tomato plant with ripe fruit (“A healthy homegrown tomato plant, grown from a single tomato slice.”). These visuals will help readers see each stage of growth.
References: Expert gardeners note that removing the gelatinous seed coating is important for germination, and that you can indeed save seeds from store tomatoes (best if they’re organic). The success story from The Gourmantic Garden confirms the method: a thick tomato slice covered in soil sprouted seedlings in about two weeks, demonstrating how this simple hack can work.

Leave a Comment