Tomatoes are tender, warm-season plants, but with a little effort you can keep them alive through winter for fresh early harvests and to preserve favorite varieties.
In tropical climates, tomatoes grow as perennials, and even in colder USDA zones they can survive indoors or in protected environments.
Overwintering tomatoes extends your growing season, gives you an earlier spring crop, and lets you carry heirlooms or top hybrids year-to-year.
In fact, this method can help you get fresh tomatoes 6 weeks sooner than traditional spring planting methods.
For example, one gardener notes that rooting tomato cuttings yields “plants ready to go in the ground when the weather is warm enough…without having to go buy them.
In short, it’s possible to save your best plants and jump-start spring by keeping them alive over winter.
Picking the Right Tomatoes and Timing
To succeed, choose the right plants. Indeterminate or “vining” tomato varieties are best for overwintering to replant in spring, because they grow continuously and can recover vigor.
Compact dwarf or cherry types (e.g. ‘Tiny Tim’, ‘Red Robin’) also work well indoors, as they stay small. In mild regions (USDA zone 9–10+), frost-tolerant varieties (like ‘Siberian’, ‘Sub-Arctic Plenty’, ‘Oregon Spring’) can even fruit through light freezes.
Plan to start preparations about a month before your usual first frost – for most of the U.S., that means by late September to mid-October.
As temperatures begin to fall, inspect and trim plants. Keep only the healthiest specimens: remove any diseased foliage and check carefully for pests (aphids, whiteflies, hornworms, etc.) before moving plants indoors.
Water them deeply up until transition, but stop heavy fertilizing by late summer to encourage slowing growth. If plants are in the ground or raised beds, gently dig them up before frost and repot into a large container with fresh potting soil.
This might mean a 2–3 gallon (8–12 L) pot per plant, so there’s room for the roots. Prune off excess stems, suckers, and any remaining fruit or flowers so the plant isn’t expending energy on new fruit.
In effect, you’re trimming the plant back to a manageable size (often 1–2 feet tall) for indoor or protected overwintering.
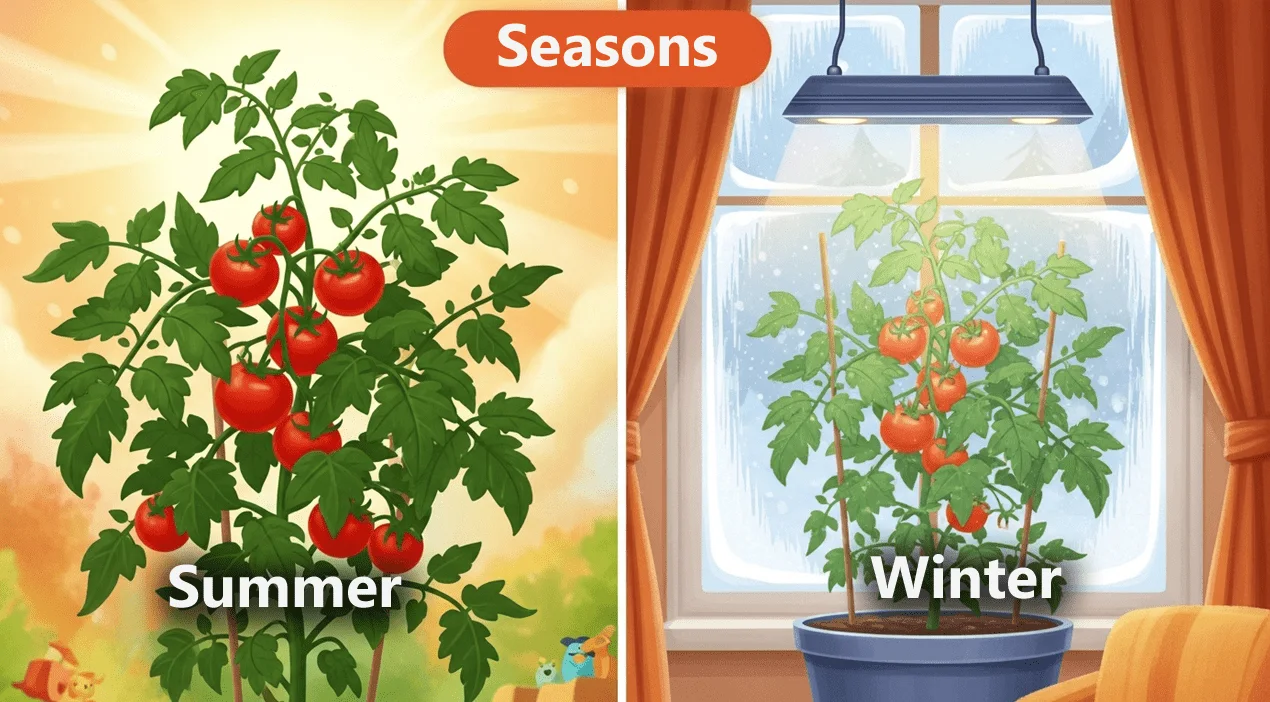
Indoor Overwintering (Houseplants)
One common method is to grow tomatoes indoors as houseplants. For a complete guide on indoor growing techniques, see our detailed article on how to grow tomatoes indoors during winter. Place the potted plants in the brightest spot you have – a south- or west-facing window if possible.
Tomatoes need lots of light (at least 6–8 hours of direct sun or 12+ hours of bright light).
In winter this usually means supplementing with a grow light: a simple fluorescent or LED grow lamp run 16–18 hours per day keeps plants vigorous. Keep the room warm (ideally 60–75°F, i.e. 15–24°C) and avoid any drafts.
- Support and Water: Use sturdy stakes or cages in each pot, since vines will continue to grow (though slowly). Water sparingly but consistently – don’t let the soil dry out completely, but avoid waterlogged roots. Treat overwintered tomatoes much like other houseplants: water when the top inch of soil is dry, and ensure good drainage.
- Light and Heat: If natural light is poor, set up an inexpensive LED or fluorescent grow light above the plants. One example is a compact 65W LED lamp that fits over a few plants (brightlanegardens.com suggests 12–16 hours of supplemental light. Maintain indoor nights around 55–60°F at minimum (lower temps can slow growth too much).
- Care: Stop fertilizing in late summer before the move. Once indoors, if you want the plant to remain mostly dormant, no feeding is needed (the plant will simply persist). If you aim for fruit through winter, use a dilute balanced fertilizer once a month and hand-pollinate any flowers that form. Prune off any leggy new shoots to focus energy on main stems. In practice, most indoor tomatoes won’t set much fruit unless very bright, so many people simply keep the plants alive and prune them if they get straggly.
Finally, as spring nears, harden off indoor plants: gradually move them outdoors a few hours each day for 1–2 weeks, then transplant back into garden beds or larger pots when nights reliably stay above ~55°F.
Greenhouse or Tunnel Overwintering
If you have a heated greenhouse or high tunnel, overwintering is simpler. Transplant a tomato into the greenhouse by autumn and close up vents. Anything above freezing (32–35°F, 0–2°C) will keep it alive.
For just survival, you need only minimal heat – even an unheated sunroom or greenhouse window can suffice as long as it stays above freezing at night. (Remember, though: tomatoes do best if nights don’t dip below ~55°F, and if daytime gets quite cool they grow slowly.)
If you want actual winter fruit, maintain daytime temperatures in the 60–70°F range and provide pollination. Use stakes or trellises to support vines (stems become “soft and tender” in low winter light).
A little fertilizer every 4–6 weeks will encourage blooms, and you may need to hand-shake flowers or use a small paintbrush to pollinate. But even without flowering, a greenhouse-kept tomato can be potted up again in spring for very early production.
Overwintering Outdoors (Mild Climates)
In USDA zones 10 and above, you can sometimes leave tomatoes in place (or in pots) through winter, since hard freezes are rare. The key is insulation: before the first serious cold, prune plants back to about 1–2 feet and remove new growth.
Then mound 2–3 inches of organic mulch (straw, leaf mold, compost) around the base of each plant to protect the roots. Some gardeners also use frost cloth or cold frames around small plants.
When spring comes and frosts have passed, simply clear the mulch and continue normal care. This method can give earlier fruit in spring, especially if you chose a cold-hardy variety.
Propagating by Cuttings
Propagating tomato cuttings for winter can save space and extend your crop. One of the easiest methods is:
- Take Cuttings: Late summer or early fall (before frost), snap off 4–6 inch (10–15 cm) stem cuttings from healthy plants. You can use the growing tips (terminal shoots) or leaf-suckers at the joints. Remove all but the top 1–2 leaves on each cutting.
- Root in Water or Soil: Place each cutting in a jar of water on a bright windowsill. Change the water every 1–2 weeks to prevent stagnation. In just a week or two, white roots will begin to form (as seen below). (Tip: use filtered or sit water 24h to let chlorine dissipate. Alternatively, dip ends in rooting hormone and stick in a pot of moist potting mix under plastic to maintain humidity.
- Multiply Cuttings: Every 4–6 weeks, you can cut the top few inches off each rooted cutting and root it again, effectively multiplying your plants. This way one original plant can become several by winter’s end. As one blogger put it, “I even take cuttings of the plants that are growing in water on my windowsill and root them in water.
- Pot and Plant Out: A month or so before the last frost, pot up each rooted cutting into sterile potting soil. Bury them deeply so new roots sprout along the stem. Keep them in bright light and no extra fertilizer (most potting soils have nutrients already). After hardening off, transplant these vigorous young tomatoes outdoors.
Tomato cuttings rooting in water on a sunny windowsill. Each will develop roots within weeks.
This cutting method ensures you have clones of your favorite varieties (seeds from hybrids won’t do that and can give a “head start” on next season.
In California, one gardener successfully rooted indeterminate cherry tomato suckers in water (leaving just 3–4 top leaves) and by spring had large, fruiting plants.
In general, overwintered cuttings establish faster than seeds and often flower early in spring.
Dormant (Bare-Root) Storage
An old-fashioned option is storing tomatoes as bare-root perennials. It works like storing bulbs:
- Prepare Before Frost: Uproot entire plants before hard freezes hit. Prune each stem back to about 12 inches tall so only short stems remain.
- Wash and Trim Roots: Gently remove as much soil from the roots as possible. Brush or rinse them clean.
- Wrap in Moist Medium: Lay the roots in a loose circle on damp shredded paper, moss, or peat. Wrap this moist material around the rootball. Then encase the bundle in plastic wrap or a bag to hold moisture.
- Bag and Store: Place the wrapped roots into a labeled paper bag (or cardboard box) and seal it. Store the plants in a cool place – a basement, garage or root cellar – where temperatures stay just above freezing (roughly 35–40°F).
White roots on a tomato cutting. A healthy root system is crucial if storing plants by cuttings or bare-root.
The goal is a dormant, humid environment so the roots don’t dry out or freeze. (If the storage air is too dry and vines shrivel, gardeners recommend adding some slightly damp peat moss in the bag.)
If done correctly, you can simply unbag and replant these plants in early spring for an exceptionally early start. While less common today, this method yields very early tomato vines with minimal effort come spring.
Winter Care
Whichever method you use, monitor your plants over winter. Keep temperatures above freezing (at least 55°F for indoor overwintered plants is ideal). Check weekly for pests indoors; aphids and whiteflies love tomato greenery.
Water carefully: plants aren’t actively growing much, so water only enough to keep them alive (watering every 1–2 weeks is usually enough for dormant plants). Remove any faded yellow leaves but be gentle to keep stress low.
Do not over-fertilize – too much nitrogen in winter can produce weak growth. If any flowers appear on indoor plants (rare unless very bright), remove them or hand-pollinate depending on your goal.
Spring Return
When nights consistently reach ~55–60°F in spring, begin transitioning plants outdoors. Harden them off gradually over 1–2 weeks by moving them outside for increasing periods each day.
At planting time, give each a final haircut: prune back long vines by half or more to encourage fresh spring growth. Then plant them in rich soil or large containers and resume regular watering and feeding.
Your overwintered tomatoes should leaf out vigorously and, since they’re already mature plants, they often bloom and set fruit earlier than spring seedlings.
Overwintering tomatoes is an engaging experiment, but it also pays practical dividends: you can extend your harvest, save money on plants, and hold onto favorites or rare varieties from one year to the next.
With preparation and the right care—whether indoors, in a greenhouse, or via cuttings—many gardeners find they can indeed keep their tomato plants alive all winter.
Even if yields over winter are modest, the plants themselves will leap into action when spring arrives, giving you a jump-start on fresh summer tomatoes.
